Access Control HID
This plugin lets you manage an access control installation with HID devices.
Before using the plugin, configure all the HID I/O Servers needed and make sure they all communicate correctly with HSYCO. No user configuration will be needed on the HID devices since the access rules are stored and managed by HSYCO.
To view the access control interface go to the URL of the "access" project on your server; for instance https://192.168.0.50/hsycoserver/access.
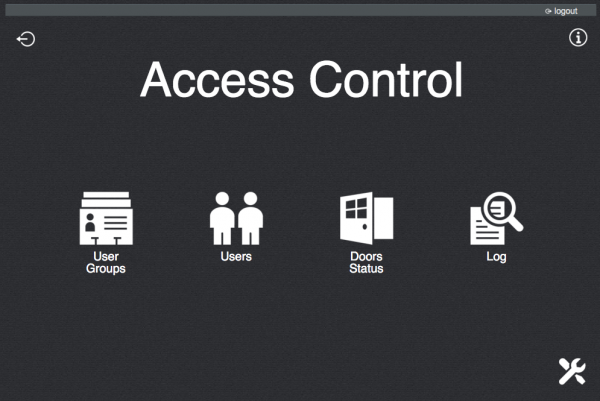
From the main page you can access the different sections:
Contents
Configuration
To configure the installation go to the configuration page by clicking on the icon in the bottom-right corner.
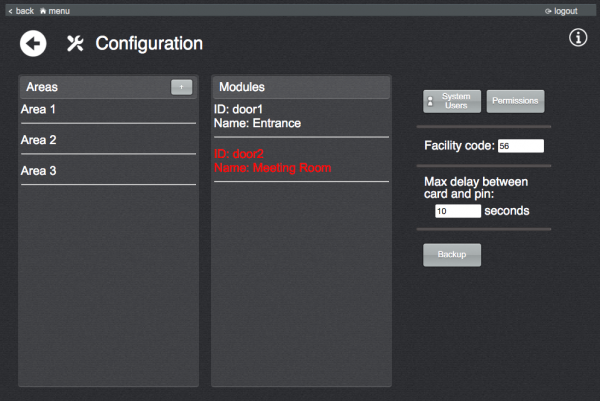
This page list all the defined areas and the detected HID modules.
Areas
An area represents a set of modules (doors) which share the same access rules.
To create a new area, press the "+" button and provide a unique name.
To edit, remove, disable or re-enable an area, click on the corresponding entry in the list. Disabling an area means temporarily blocking the access to all users to all the doors belonging to the area, until re-enabled. If an area is not enabled, the corresponding entry in the list will have a lowed opacity.
Modules
The list of modules show all the HID Solo IO servers defined in HSYCO's settings and their corresponding names as defined in the modules' configuration. If an entry appears of red color, it means that HSYCO cannot connect to the module.
Clicking on an entry in the module's list it is possible to access and edit its configuration:
- ID: the ID assigned to the corresponding IO server. Cannot be modified.
- Name: by default is the name set in the HID module's configuration. It can be changed to any other unique name.
- Enabled: if unchecked no user will be allowed to access to door.
- Type:
- One reader: Only one reader is connected to this module.
- Two reader: Two readers are connected to this module: entrance and exit readers.
- Programmer: This module will not be used to control an entrance; instead, it will be used by the application as card reader to assign cards to users.
- Area: area this module belongs to.
- Entrance/Exit reader:
- Card: users only use cards to access from this reader.
- Pin: users only use pin codes to access from this reader.
- Card and Pin: users use cards in combination with pin codes to access from this reader.
- Card or Pin: users use cards or pin codes to access from this reader.
- Invert entrance/exit: in the case of a "Two readers" module, checking this option will cause the application to invert the default transit directions.
System access
The System Users and Permissions buttons allow to manage the system users who will use the access control application and specify which functionalities to allow/deny to each user.
Installation settings
The Facility code must be set to the value assigned by HID to your installation when purchasing the system.
The Max delay between card and pin option allows to specify how much time can elapse between the reading of a card and the inputing of the pin code for readers with typology "Card and Pin".
Backup
The Backup button gives access to the list of previously saved backups and allows to create a backup of the current configuration.

