Arduino
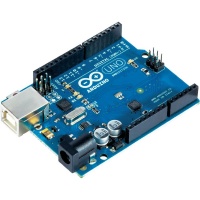
Arduino is a microcontroller platform and development tools combined into an easy-to-use, standardized and inexpensive architecture that can greatly enhance the physical input/output capabilities of HSYCO.
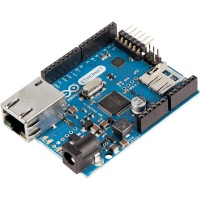
HSYCO supports Arduino through an open source library installed in the Arduino IDE. This library implements a bidirectional communication protocol with HSYCO. A sketch in Arduino that allows HSYCO to directly read and control any of the digital and analog pins on any Arduino board is only a few lines long, and is provided as a built-in example in the HSYCO library. HSYCO supports Arduino Uno, Arduino Ethernet, Arduino Due and other compatible boards. The connection is serial, usually over the USB port, or TCP over the Ethernet. The Arduino I/O Server provides for datapoints to be used in the EVENTS language and Java to read and control Arduino pins, but also to exchange custom messages between your sketch in Arduino and HSYCO applications.
Contents
Communication
Arduino can be connected to HSYCO through a USB cable (serial communication) or via Ethernet depending on the model.
Serial (USB)
The comm port ID depends on your HSYCO server configuration. It should be "ttyACM0" if there are no other devices connected to the USB ports.
These are the default serial communication parameters used by the HSYCO library:
| Baud rate | 115200 |
| Data bits | 8 |
| Stop bit | 1 |
| Parity | none |
| Flow control | none |
Ethernet
The IP address of the board is specified in its sketch (see Arduino Programming) and the default port is 23.
Arduino Configuration
IDE Configuration
Before you start writing sketches using the Arduino IDE, you should unzip and copy the HSYCO or HSYCONET libraries in the libraries directory.
On Mac, the libraries directory is in your home directory, Documents/Arduino/libraries.
On Linux it is in the shetchbook directory of your home directory.
On Windows the folder is in My Documents\Arduino.
Use the HSYCO library when you are connecting Arduino and HSYCO via a serial/USB cable, or HSYCONET if using TCP over an Ethernet network.
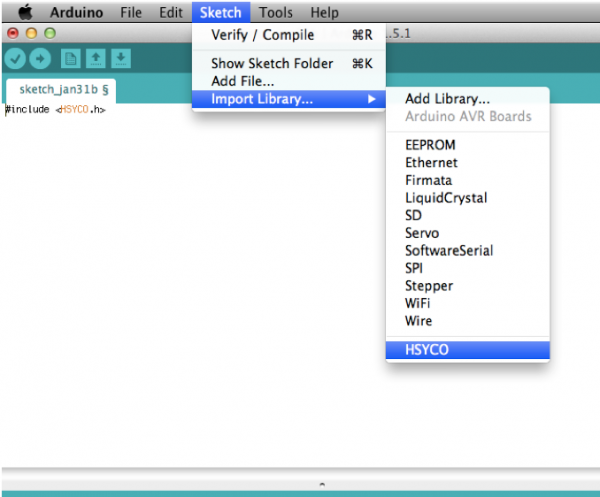
Quit and reopen the Arduino IDE to make it aware of the new library. After restarting the Arduino IDE, you can create a new custom sketch with File → New, then Sketch → Import Library → HSYCO.
Arduino Programming
The HSYCO or HSYCONET library in Arduino will map all I/O pins, and the most relevant I/O functions in Arduino, to datapoints that you can use to set output pins and read input pins of the Arduino board.
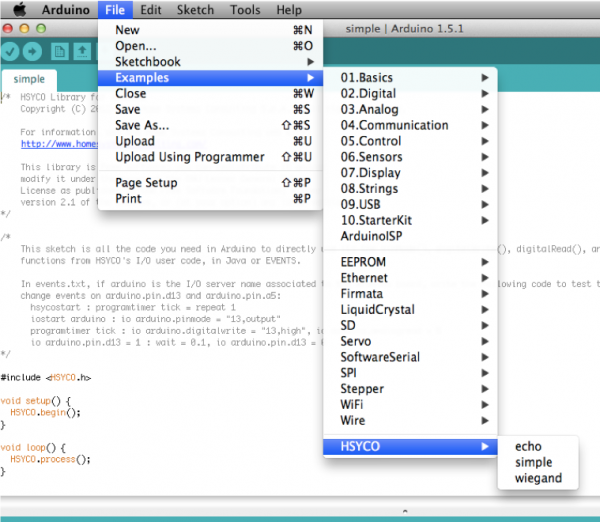
If you only need to directly control Arduino’s pins from HSYCO EVENTS or Java, without any custom sketch code in Arduino, select File → Examples → HSYCO → simple.
Upload the simple sketch to your board, and you are ready to use Arduino from HSYCO.
This sketch is all the code you need in Arduino to directly call the pinMode(), digitalWrite(), digitalRead(), analogRead() and analogWrite() functions from HSYCO.
Simple sketch using the HSYCO library (serial communication):
#include <HSYCO.h>

void setup() {
    HSYCO.begin();
}

void loop() {
    HSYCO.process();
}
Simple sketch using the HSYCONET library (Ethernet communication):
#include <HSYCONET.h>
#include <Ethernet.h>
#include <SPI.h>

byte mac[] = { 0xDE, 0xAD, 0xBE, 0xEF, 0xFE, 0xED };
IPAddress ip(192, 168, 1, 177);
IPAddress subnet(255, 255, 255, 0);
IPAddress gateway(192, 168, 1, 1);

void setup() {
    Ethernet.begin(mac, ip, gateway, subnet);
    HSYCONET.begin();
}

void loop() {
    HSYCONET.process();
}
HSYCO Library
The HSYCO class implements a bidirectional serial communication protocol with the Arduino I/O Server in HSYCO. Following are the available methods:
void begin()
Initializes the HSYCO library and serial communication settings, using the default serial port (Serial) and 115200 bps speed.
void begin(long speed)
Initializes the HSYCO library and serial communication settings, using the default serial port (Serial) and the specified speed.
Parameters:
speed- communication speed in bits per second (baud).
void begin(Stream &stream)
Initializes the HSYCO library, using the specified stream. The stream should be properly configured.
Parameters:
stream- the Stream object used to communicate with HSYCO.
void process()
Process incoming commands from the Arduino I/O Server. This method should always be present in Arduino’s main loop, even when you are only using Arduino for sending data to HSYCO, or the Arduino I/O Server will fail to connect to the board.
void ioSet(char* name, char* value)
Set the datapoint of the I/O Server with ID name to the specified value. The change event in HSYCO is forced, so that the ioSet() call in Arduino will always fire an event, even when the value is not changed.
Parameters:
name- the datapoint ID; it cannot contain the 0x0a, 0x0d, 0xff, or '=' charactersvalue- the value to set the datapoint to; it cannot contain the 0x0a, 0x0d or 0xff special characters.
void ioSet(char* name, int value)
Set the datapoint of the I/O Server with ID name to the specified numerical value. The change event in HSYCO is forced, so that the ioSet() call in Arduino will always fire an event, even when the value is not changed.
Parameters:
name- the datapoint ID; it cannot contain the 0x0a, 0x0d, 0xff, or '=' charactersvalue- the numerical value to set the datapoint to; it cannot contain the 0x0a, 0x0d or 0xff special characters.
void attach(callbackFunction myFunction)
Specifies a function to call when an IO write is executed on HSYCO, using the IO action in EVENTS or the ioSet() Java method, if the datapoint ID is not one of the reserved ones.
Parameters:
myFunction- the function to call. This function must take two char* parameters, corresponding to the datapoint ID and value.
void detach()
Turns off the callback to a previously attached function.
HSYCONET Library
The HSYCONET class implements a bidirectional TCP/IP communication protocol with the Arduino I/O Server in HSYCO. Following are the available methods:
void begin()
Initializes the HSYCONET library and the internal socket server.
void process()
Process incoming commands from the Arduino I/O Server. This method should always be present in Arduino’s main loop, even when you are only using Arduino for sending data to HSYCO, or the Arduino I/O Server will fail to connect to the board.
void ioSet(char* name, char* value)
Set the datapoint of the I/O Server with ID name to the specified value. The change event in HSYCO is forced, so that the ioSet() call in Arduino will always fire an event, even when the value is not changed.
Parameters:
name- the datapoint ID; it cannot contain the 0x0a, 0x0d, 0xff, or '=' charactersvalue- the value to set the datapoint to; it cannot contain the 0x0a, 0x0d or 0xff special characters.
void ioSet(char* name, int value)
Set the datapoint of the I/O Server with ID name to the specified numerical value. The change event in HSYCO is forced, so that the ioSet() call in Arduino will always fire an event, even when the value is not changed.
Parameters:
name- the datapoint ID; it cannot contain the 0x0a, 0x0d, 0xff, or '=' charactersvalue- the numerical value to set the datapoint to; it cannot contain the 0x0a, 0x0d or 0xff special characters.
void attach(callbackFunction myFunction)
Specifies a function to call when an IO write is executed on HSYCO, using the IO action in EVENTS or the ioSet() Java method, if the datapoint ID is not one of the reserved ones.
Parameters:
myFunction- the function to call. This function must take two char* parameters, corresponding to the datapoint ID and value.
void detach()
Turns off the callback to a previously attached function.
Datapoints
| ID | Value | R/W | Description |
|---|---|---|---|
| connection | online | R | connection established with the board |
| offline | R | HSYCO can't connect to the board | |
| pinmode | <pin>,input | W | execute the pinMode() function, configuring the pin <pin> as INPUT, OUTPUT or INPUT_PULLUP
|
| <pin>,output | |||
| <pin>,input_pullup | |||
| digitalwrite | <pin>,high | W | execute the digitalWrite() function, setting the pin <pin> to high (5V or 3.3V) or low (0V)
|
| <pin>,low | |||
| digitalread | <pin> | W | execute the digitalRead() function, reading the value of pin <pin>
|
| analogwrite | <pin>,<value> | W | execute the analogWrite() function, setting the pin <pin> to a PWM output with duty cycle equal to <value>; the value must be between 0 (always off) and 255 (always on)
|
| analogread | <pin> | W | execute the analogRead() function, reading the value of pin <pin>
|
| pin.<n> | 0 | R | pin <n> is low |
| W | execute the digitalWrite() function, setting the digital pin <n> to low (0V)
equal to digitalwrite = <n>,low | ||
| 1 | R | pin <n> is high | |
| W | execute the digitalWrite() function, setting the digital pin <n> to high (5V or 3.3V)
equal to digitalwrite = <n>,high | ||
| pin.a<n> | <value> | R | analog pin <n> is set to duty cycle equal to <value> |
| W | execute the analogWrite() function, setting the analog pin <n> to a PWM output with duty cycle equal to <value>; the value must be between 0 (always off) and 255 (always on)
equal to analogwrite = a<n>,<value> | ||
| pin.dac<n> | <value> | R | DAC pin <n> is set to <value> |
| W | execute the analogWrite() function, setting the DAC pin <n> to <value>
equal to analogwrite = dac<n>,<value> | ||
| <custom_name> | <value> | R | the ioSet(<custom_name>, <value>) method was called from the Arduino sketch |
| W | if a callback function is defined in the Arduino sketch, this function is called passing <custom_name> and <value> as parameters. The parameters cannot contain the 0x0a, 0xff, or '=' characters |
Pins syntax
The naming convention HSYCO uses for the pins corresponds to the one used by Arduino.
Digital pins are numbered from 0 up, with no prefix.
Analog pins start with the "a" prefix, like "a0", "a1" etc. (all lowercase).
The DAC analog out pins in Arduino DUE are "dac0" and "dac1" (all lowercase).
Release Notes
3.3.0
- initial release
Arduino is a registered trademark of Arduino team.


