Tutorial1
HSYCO SERVER ships pre-installed with the latest version of the HSYCO software, on a Linux Ubuntu 12.04 LTS Server distribution stripped of all not-essential services.
The Oracle Java SE Runtime Environment version 7 is also installed. No other software is required.
This tutorial describes the access procedures for the basic management of the system and the structure of HSYCO’s installation and configuration files.
Initial Set-Up
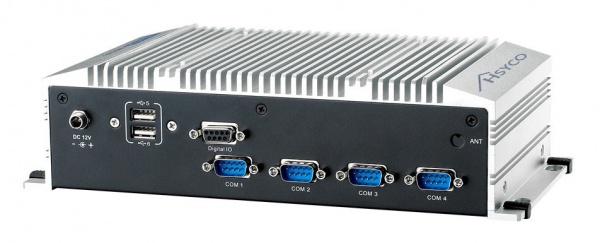
Hsyco comes with different hardware configurations:
- HSYCO MINI - ARK1122
To start the server simply plug the power supply. HSYCO automatically starts, the execution of HSYCO is signalled by three consecutive high-pitch beeps.
- HSYCO PRO - ARK2120
To start the server simply plug the power supply. HSYCO automatically starts, the execution of HSYCO is signalled by three consecutive high-pitch beeps.
- HYSCO PI - RASPBERRY PI
To start the server simply plug the power supply. HSYCO automatically starts in two minutes (approx).
HSYCO SERVER is configured with the following default network configuration:
- IP address: 192.168.0.50
- Net mask: 255.255.255.0
- Default Gateway: 192.168.0.1
- DNS: 192.168.0.1
The IP address 192.168.0.50 will be used from now on in all the examples as the HSYCO SERVER address.
On the two Ethernet ports server, the port which is usually configured is the one next to the USB ports, shown as LAN1. The Ethernet port LAN2, on the right, works but it is not configured.
Access to the Manager
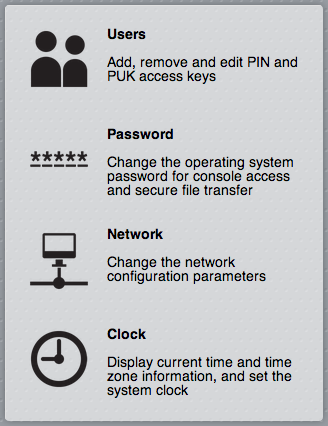
HSYCO SERVER is pre-configured with a Web-based toolkit of applications, the Manager, that gives you access to configuration and administration functions, including the ability to change the network settings and the operating system's password, HSYCO users management and the tools to create customized graphic user interfaces.
To access the system's management application, simply called Manager from now on, enter the following URL in your Web Browser:
https://192.168.0.50/hsycoserver/manager
The Manager runs on most modern Web browsers, including tablets like Apple’s iPad. It even runs on small screen devices like the iPhone or iPod touch, although a larger screen size is advisable for ease of use. Microsoft’s Internet Explorer versions 8 and older are not supported, and IE9 is not guaranteed to work, although it should in most cases.
HSYCO default configuration only accepts Web requests through the HTTPS secure protocol, while access via HTTP is disabled.
Furthermore, to protect against malicious service discovery robots, HSYCO does not answer to Web requests where only the server address is defined, for example https://192.168.0.50, but requires an extended URL, which must include an access key, called URLKey, defined in the general system configuration parameters.
The URLKey is not a secret password, but only an additional protection feature.
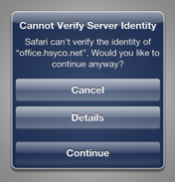
Because the SSL certificate used to secure the communication between the Web Browser and HSYCO SERVER is self-generated, you will be asked to accept the server's certificate.
On the iPod touch, iPhone or iPad press Continue, on other browsers follow the dialog boxes to permanently accept the certificate.
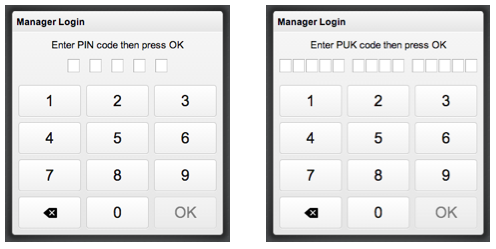
You will see the PIN and PUK authentication page. Enter the default PIN and PUK, and press OK:
PIN: 0000
PUK: 00000 0000 00000
Press the "Admin" icon to open the Administration page.
Users Management
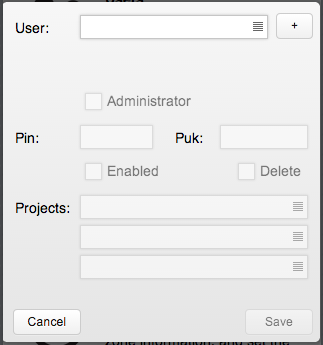
The users page lets you fully manage individual users from the HSYCO Web interface.
You can set and revoke the administrator rights, enable and disable a user, modify PIN and PUK codes, delete a user, and also define the rights of access to the subdirectories.
If no projects have been specified through the Web interface, the user has no limits and can access all the existing projects.
To change the predefined PIN and PUK, select user, then enter the new PIN and PUK codes in the appropriate fields, and press Save to confirm.
Or you can create one or more new users, at least one of them with administrator privileges, then log in again with the new administrator PIN and PUK and delete the default user.
To delete an user select it, check the box "Delete" and then press the button "Save".
