Difference between revisions of "Axis Cameras"
| Line 53: | Line 53: | ||
[[File:AxisCameras5.png]] | [[File:AxisCameras5.png]] | ||
| + | |||
| + | |||
| + | == Motion and PIR detection configuration with new firmware year 2012 == | ||
Revision as of 17:19, 11 April 2014
How to configure Axis cameras with Hsyco
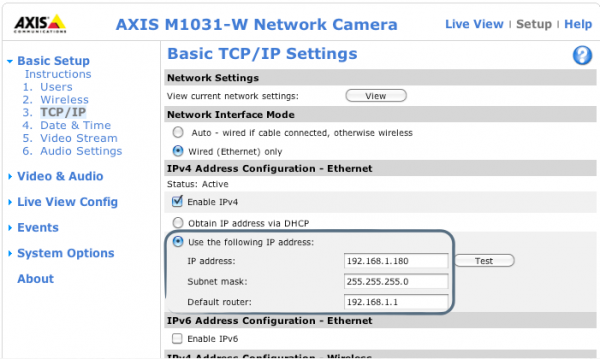
From a Web browser, typer the URL to access the Axis camera interface. (for example http://192.168.1.180).
Basic Setup > TCP/IP: To change the camera IP address go to the basic TCP/IP Settings section:
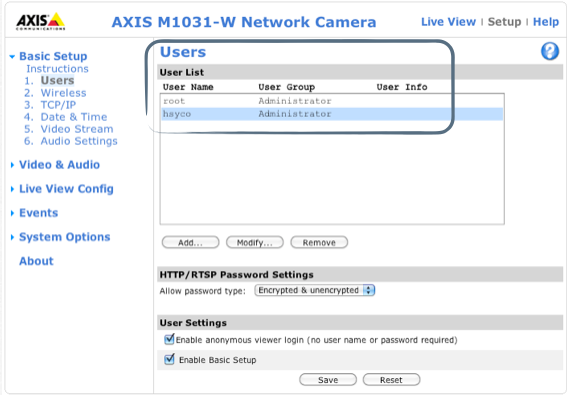
Basic Setup > Users > Add: add the user “hsyco” setting User Name and Password as Settings (Camera.axis.User = hsyco Camera.axis.Password = 00000000)
User Name: “hsyco” Password: “00000000”
Motion and PIR detection configuration with old firmware (before 2011)
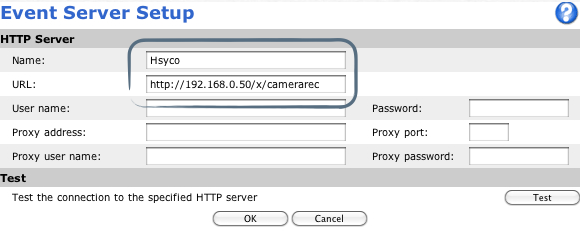
Events > Event Servers > Add HTTP: add a new HTTP Server and specify: Name: Hsyco, for example URL: http://192.168.0.50/x/camerarec (192.168.0.50 is the HSYCO IP address)
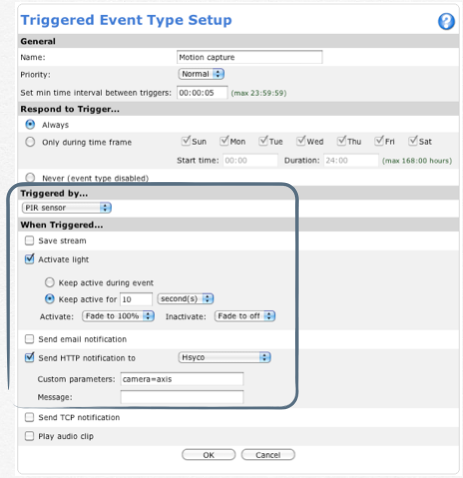
Events > Event Types > Add Triggered: event triggered by a PIR sensor
Send HTTP notification to the HSYCO server and specify the camera id, as defined in Settings
- Send HTTP notification to “Hsyco”
- Custom parameters: camera=axis
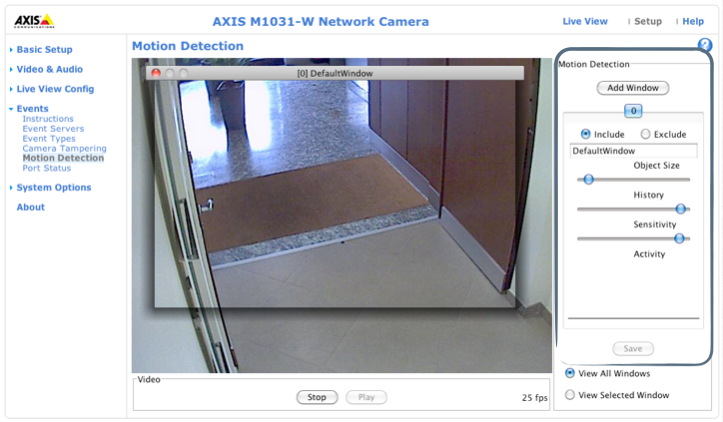
The following screenshot shows an example of an event triggered by motion detection. First of all, you need to add the window of motion (Events > Motion Detection)
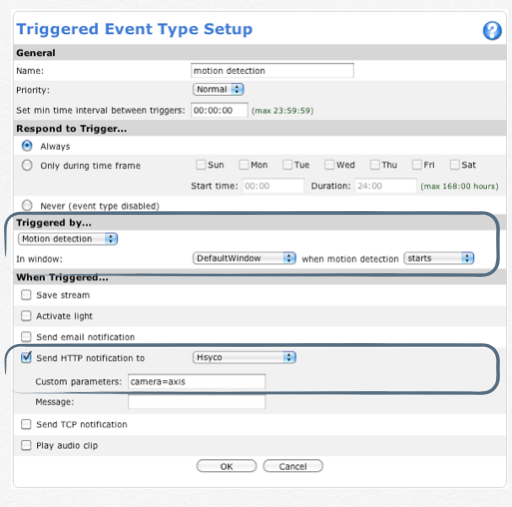
Events > Event Types > Add Triggered: define the event triggered by motion detection
Send HTTP notification to the HSYCO server and specify the camera id, as defined in the hsyco.ini file
- Send HTTP notification to “Hsyco”
- Custom parameters: camera=axis
