Difference between revisions of "NETIO"
| Line 25: | Line 25: | ||
=== Communication === | === Communication === | ||
*'''IP Address''': local IP address of NETIO device | *'''IP Address''': local IP address of NETIO device | ||
| − | *'''Port''': leave blank | + | *'''Port''': leave it blank |
=== Authentication === | === Authentication === | ||
*'''User''': username, as set with device web configuration page | *'''User''': username, as set with device web configuration page | ||
*'''Password''': password, as set with device web configuration page | *'''Password''': password, as set with device web configuration page | ||
Revision as of 10:48, 20 November 2020
This driver commands a NETIO power socket and reads status from it, it uses HTTP protocol with basic authentication (username and password).
NETIO supported models are: PowerCable REST 101x, PowerPDU 4C, PowerPDU 4PS, PowerDIN 4PZ, PowerBOX 3Px, 4, 4All.
Device Configuration
Firstly the device must be configured to be operative.
At the first startup the device acts as an access point, connect to it (see device manual for this step) and configure your network credentials. Remember to assign a static IP address to the device (remove the flag from DHCP option) as shown in the example below:
When you save network configuration the device reboots and connects to your network.
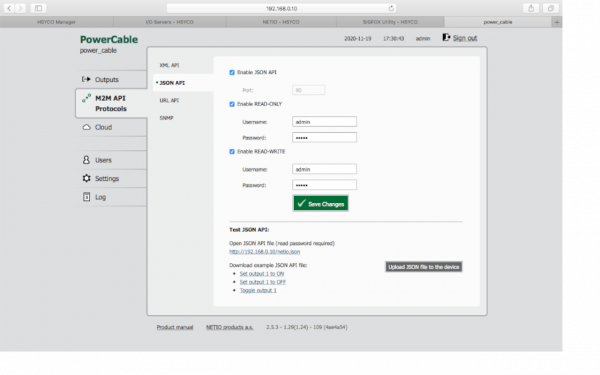
After that connect to the device web configuration page (at the IP address that you have assigned to the device), relative credentials are specified on device manual. On the web configuration page you have to configure M2M API JSON Protocol as shown below:
Obviously you can change username and password.
HSYCO Configuration
Add the NETIO I/O Server in the I/O Servers section of the Settings and set its parameters:
Communication
- IP Address: local IP address of NETIO device
- Port: leave it blank
Authentication
- User: username, as set with device web configuration page
- Password: password, as set with device web configuration page
