Difference between revisions of "Working with Forms"
| Line 89: | Line 89: | ||
(endofmenu)</poem> | (endofmenu)</poem> | ||
|- | |- | ||
| − | | | + | |colspan="2"|This is the code in '''user.java:''' |
|- | |- | ||
|valign="top"|<source lang="java"> | |valign="top"|<source lang="java"> | ||
| Line 104: | Line 104: | ||
</source> | </source> | ||
|- | |- | ||
| − | | | + | |colspan="2"|This is the same solution, but in '''events.txt:''' |
|USER mydate: uiset mytext.value = "text received" | |USER mydate: uiset mytext.value = "text received" | ||
USER myinput: uiset mytext.value = "date received" | USER myinput: uiset mytext.value = "date received" | ||
Revision as of 17:59, 28 February 2014
Contents
Introduction to Forms
There are several objects that allow the creation of a form to send data to the server. These objects are of three types: fields, submit buttons and containers.
- Fields:
- Field panels:
- timepanel: similar to time
- datepanel: similar to date
- keypadpanel: similar to keypad
- Submit buttons:
- submit: default size
- submitmini: "mini" size
- submitmicro: "micro" size
- submitimage: custom image
- Container: to group multiple objects
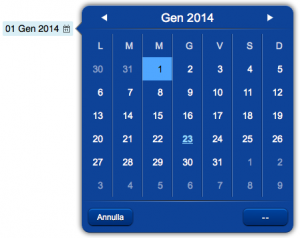
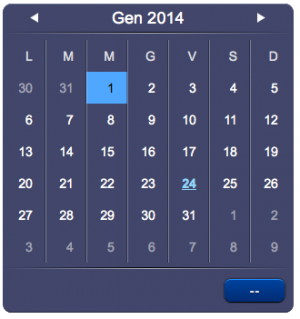
Fields of type time, date and keypad have a specific panel used to input the value, that will be visible in a popup when the field is clicked.
These panels can also be added directly to the page, using the field panel objects: timepanel, datepanel and keypadpanel objects.
Containers are used to group fields and submit buttons.
Submit buttons are used to commit changes and send all the fields' values to the server. Only the fields inside the same container and nested containers will be considered.
Fields can also have an autosubmit mode, that sends the value when there's a change, instead of waiting for the user to click on a submit button. This mode is automatically activated if there's no submit button on the page or in one of the parent containers. This autosubmit mode can also be toggled using a specific UISet (for example see the autosubmit UI Attribute on the input object).
Field panels have an OK button that works as a submit button. If there's another submit button, the OK buttons on the panels won't be visible.
Creating a Form
Client-side
A form can be created either using the Project Editor to edit the project, or by manually writing the code in the project's index file (index.hsm).
Using the Project Editor, the desired fields have to be placed on the page (or inside a container). Each field requires a specific id so the code on the Server-side can identify it properly. Placing a submit button will change the behavior of the fields accordingly.
Server-side
To receive the values that the client is sending, code needs to be written on the Server-side. In a form, when one of these things happen:
- a change is detected on a field in autosend mode
- the OK button is pressed on a field panel
- a submit button is pressed
a request will be sent that can be dealt with from the user.java code or the events environment.
If the field's or submit button's id starts with $, then the server will also automatically set a variable named $<id> to the appropriate value.
Example: single field, no submit button
If a single field is sending its value (the above first two cases), HSYCO will call the method:
userCommand(String name, String param)in the user.class class. The method will receive:
- name - the id of the field object
- param - the value of the field object
The USER <id> event will be generated as well.
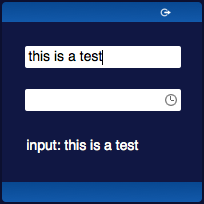
| E.g.: in this example we have: an input field with id "myinput", a date field with id "mydate", a text object with id "mytext" and no submit buttons. The request will be sent for each field whenever there's a change in the field's value and the text's value will be set. | ||
| Interface: | index.hsm: | |

|
(#skin blue) | |
| This is the code in user.java: | ||
function userCommand(String name, String param) {
	// if we're receiving the input's value...
	if (name == "myinput") {
		uiSet("mytext","value","text received");
	}
	// if we're receiving the date's value...
	else if (name == "mydate") {
		uiSet("mytext","value","date received");
	}
} | ||
| This is the same solution, but in events.txt: | USER mydate: uiset mytext.value = "text received"
USER myinput: uiset mytext.value = "date received" | |
Multiple fields with a submit button
If a submit button has been pressed, the method will receive:
- name - the id of the submit button object
- param - a list of ids and values of every field, separated by "@". E.g. field1@value1@field2@value2
Example
- Open the Project Editor from the Manager
- Create a new project
- Add


